
The developers of WordPress seem to be thinking several steps ahead of the average user at all times. As such, moving WordPress from one area of the Internet to another can be done without extensive HTML or PHP knowledge. In fact, your use of programming to move your website will be quite limited depending on what you wish to accomplish. In this tutorial, you’ll learn how you can move the site to another location without losing content or images.
Moving Content and Images Only
It’s not uncommon for owners to want a revamp and redesign of the website. Perhaps part of this entails moving to a new host that provides greater features for what you’re trying to build. WordPress makes moving your content and images to the new host simple – by using the Export/Import tools. This is done by:
- Going into your old WordPress dashboard and selecting the “Tools” command. From here, you’ll want to click on, “Export.”
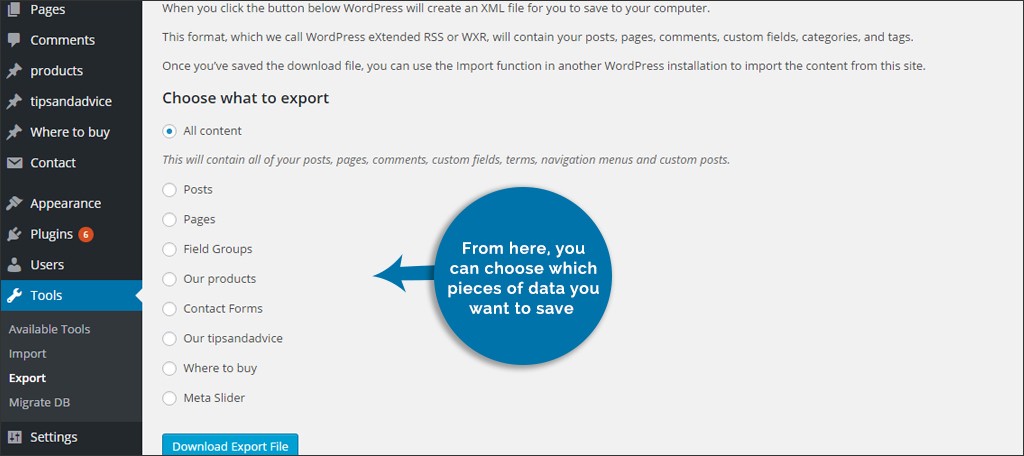
- Once the export screen is displayed, you’ll have several options available. From here, you can choose which pieces of data you want to save. Posts, pages and other data from specific plugins can be exported. Select the radio button of the data you want to move and click the “Download Export File” button.
- WordPress will prompt you to save the .XML file to your computer to be used later. Make sure this is saved in an easy-to-find location such as “My Documents” or the desktop.
- Go into your new installation of WordPress and select the “Tools” command. This time, you’ll want to click on “Import.”
- On the import screen, you’ll have several options available in alphabetical order. You’ll want to use the “WordPress” type located at the bottom.
- If you don’t have the “WordPress Importer” plugin installed, you’ll be prompted to install it. Run and activate this plugin in order to proceed.
- After activating the plugin, you’ll be brought back to the import screen with an option to browse for your .XML file. Click the “Browse” button and select the file you downloaded earlier. Click the “Upload file and import” button available under the text field.
- On this next screen, you’re given the option to change the author of the content. You can leave this as default and change the names later, or you can create a new account as the author.
- Under the author area, you’ll want to make sure the box is checked for “Download and import file attachments.”
- Finally, click the “Submit” button on the bottom. This will then retrieve all of the pertinent information from your old site and place it into your new one.
Moving Your Site from WordPress.com
Perhaps you used WordPress.com in order to test the waters, so-to-speak, regarding the management system. Afterwards, you decided to get a stand-alone hosting provider for WordPress in order to have greater control over the website. Migrating your information from WordPress.com to your new host is relatively easy and may only take you a few minutes. It’s almost identical to the steps above for moving data with one important difference – you want to make sure you get all of your content.
It’s important to note that only your content will be transferred by using the following steps. Themes and plugins are connected to the WordPress.com website and are unavailable for transfer. However, this could give you a great opportunity to find new themes and plugins that would better to suit your needs.
- Log into your WordPress.com account and select “Tools” from your dashboard.
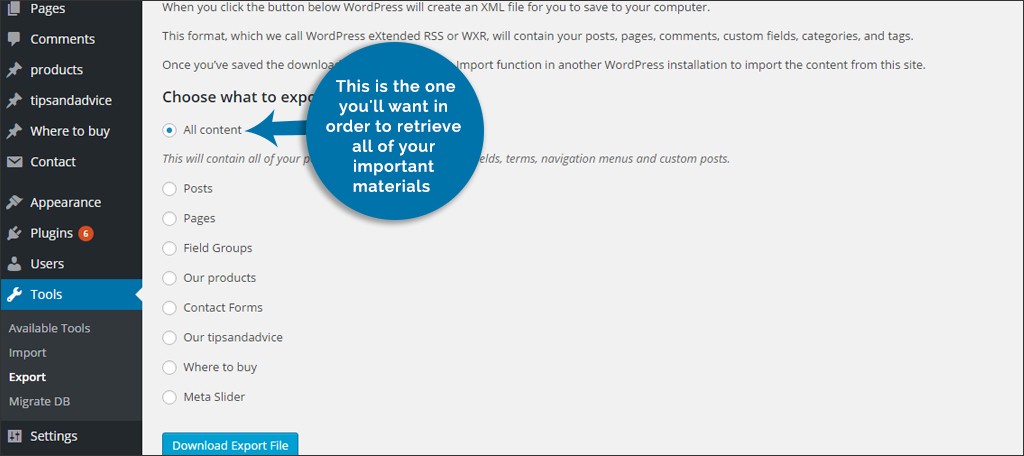
- Under tools, you’ll want to select “Export.” In the export screen, you have an option on the top labeled “All content.” This is the one you’ll want in order to retrieve all of your important materials. This will include posts, pages, comments of visitors, menus and more. With the radio button selected on “All content,” click the “Download Export File” button below.
- WordPress.com will prompt you to download a .XML file. As mentioned above, make sure you put this file somewhere on your computer that is easy to access.
- Next, log into your new installation of WordPress on your web host.
- Form the dashboard, go to “Tools” and click “Import.” You’ll select the “WordPress” type near the bottom.
- The prompt to install the “WordPress Importer” plugin will launch automatically if you don’t already have it installed. Go ahead and install the plugin and click the link to activate and run the plugin.
- Once you’re taken back to the “Import WordPress” screen, you’ll have the option to browse for the .XML file you previously downloaded. Once you add the .XML file, click the “Upload file and import” button.
- As with moving your data, WordPress will ask if you want to rename the import author. Change this according to your needs and make sure the “Download and import file attachments” check box is marked.
- Once you click the “Submit” button, all of your important information from WordPress.com will be available on your new website host. Now all you have to do is find new themes and plugins for your site.
Completely Moving WordPress from One Host to Another
Moving your website completely from one host to another is a bit more convoluted than the previous examples. Although there is a bit more work involved, it isn’t as difficult as many might think. In reality, it is more time consuming than tough. The three major components you’ll need to worry about consist of:
- Copying files to the new host
- Moving the database
- Changing a few lines of code in the configuration of WordPress
You’ll Need FTP Software
To copy all of your website’s files, you’ll need to use FTP applications, or File Transfer Protocol. These programs are installed onto your computer system for the purpose of connecting to your host and accessing website files. There are free programs available online such as CuteFTP, Filezilla and SmartFTP. If you use cPanel, you can download all of your site’s documents in a single .ZIP file from the “File Manager” tool.
Accessing the FTP Client
In order to connect to your host, you need to know your site’s FTP credentials. Your host should have these available to you. If you use cPanel, these can be found in the “FTP Accounts” tool. The username, password and root folder will need to be put into the FTP program in order to connect to the host.
Copying Files from the Old Host to New Host
When you have the FTP program installed and all credentials ready, it’s time to start moving files. This is done by:
- Connecting to your old host using the FTP program and download all of the files from your site’s root folder.
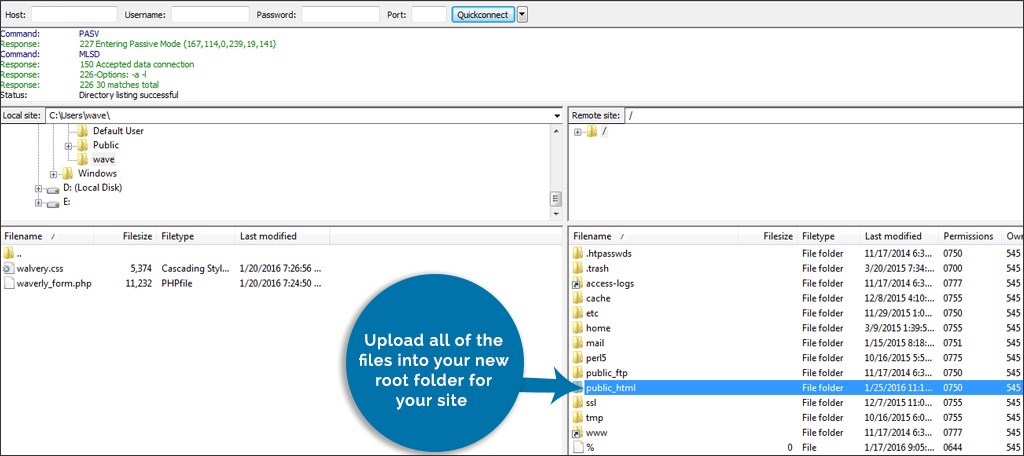
- Connecting to your new host with the FTP program and upload all of the files into your new root folder for your site.Once the upload is complete, your files are ready for the next steps. Essentially, you just copied almost the entire website onto the new host server.
Copying the Database
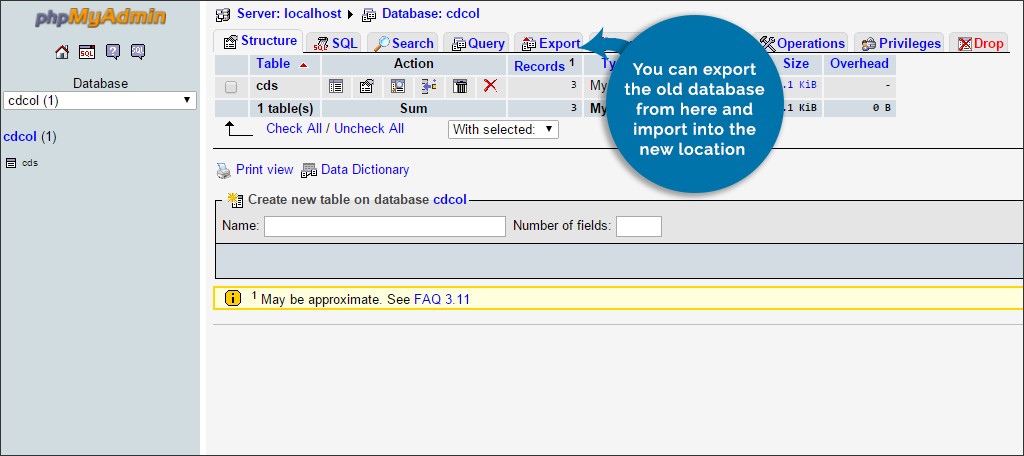
The database for WordPress stores a great deal of needed information. It’s vital you copy this in order for your website to function correctly. To do this, you need to export your database from the old host. This can be done from cPanel’s “phpMyAdmin” if you have that tool available. Otherwise, you may have to contact support to help you download the database.
Once you’ve exported the database, you’ll need to create a new one on the new host. Again, cPanel has the capacity to help you do this through the “MySQL Databases” tool. However, you may need to contact support from your new host to help you build a new database. Once this is created, you can import the old database content into the new location.
Pointing WordPress to the New Host
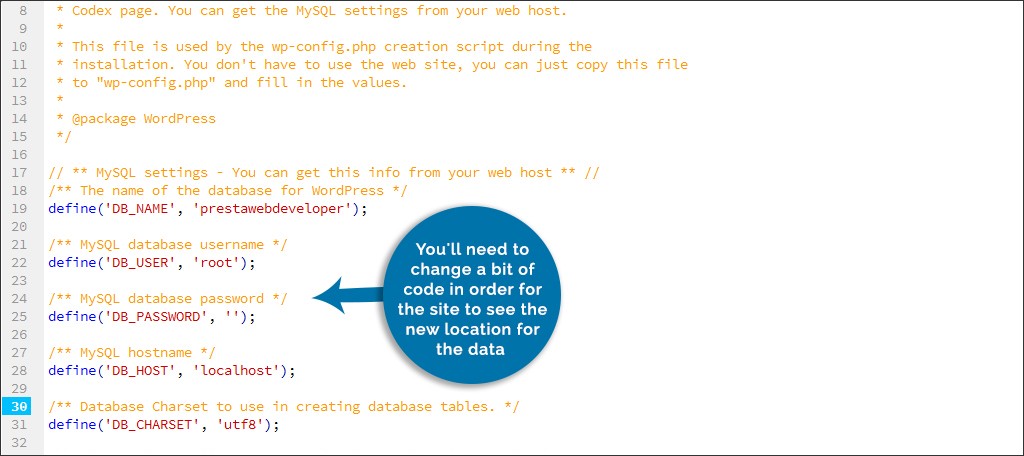
Your WordPress copy on the new host will still have its old information for the database. You’ll need to change a bit of code in order for the site to see the new location for the data. This may sound a bit tricky, but it’s relatively easy. This is done by:
- Finding the wp-config.php file in your WordPress root folder.
- Find the following code in that file:
define(‘DB_NAME’, ‘user_wrdp1’);
/** MySQL database username */
define(‘DB_USER’, ‘user_wrdp1’);
/** MySQL database password */
define(‘DB_PASSWORD’, ‘password’);
Once you’ve located the above code, replace the information with your new credentials. The username, password and database name will need to be changed before your site will pull the correct information. After you’ve made these changes, save the file. Your WordPress website should be working like it had in the past – only with a new host and server.
When it comes to moving WordPress, it may be advisable to seek out professional help if you’re in any doubt of your abilities. It’s better to err on the side of caution than to risk losing a site you’ve been maintaining for years. Don’t be afraid to ask for assistance if something seems too difficult.